


In Part I of this series, we considered the biomechanical evaluation of the foot and ankle with a seated patient, and outlined some of the steps to test joint ranges of motion and end position (Read part 1). Understanding the mechanics of a patient’s foot along with his or her hip motion and muscle strength can give clues to possible causes of pathology. However, examining the non-weight bearing foot in open chain provides a limited view of function. To get the full picture it is vital to also assess the patient while he or she is weight bearing and while in gait.
Biomechanical Evaluation with Patient Standing
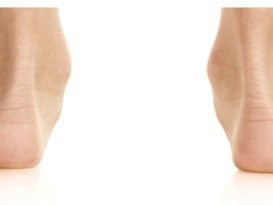
One simple static evaluation compares resting calcaneal stance position (RCSP) against neutral calcaneal stance position (NCSP). RCSP is the measure of the angle of calcaneal bisection to the vertical with the patient standing relaxed. Specifically look for heel valgus or varus. Normal feet will be vertical or slightly everted, displaying two to three degrees of calcaneal valgus. From this position, have the patient externally or internally rotate his or her tibias, or manipulate his or her feet while palpating the talus. When the head of the talus is equally prominent on the medial and lateral sides, they are in their neutral position. Again, measure the angle of calcaneal bisection to the vertical. In NCSP, a normal foot will be vertical or slightly inverted by two to three degrees. The difference between the two measurements indicates the extent of subtalar joint compensation when weight bearing. Some practi-tioners consider NCSP as the ideal rearfoot position for mid-stance and aim to recreate it in functional foot orthotics. Patients with flexible flatfoot often demonstrate quite a difference in rearfoot calcaneal angle, but this also indicates the amount of correction available. Conversely, if there is little or no change between the two measurements, and the foot appears rigid, then the amount of functional cast modification will also be limited.
Conducting the Same Measure for Navicular Drop
Mark the medial prominence of the navicular and have the patient maintain the NCSP. Then, with a ruler in place, let the patient drop into RCSP and note how far the navicular descends. All feet should demonstrate some lowering of medial arch height, but a navicular drop of more than 8-10mm is generally considered symptomatic and requires intervention.
Another quick and effective protocol to assess each foot is the Foot Posture Index. This system was developed in the 1990s to easily and reliably classify foot type. With the patient standing in the RCSP, each of the six component tests are graded and totaled. A fuller description of the method and free copies of the data sheet are available at https://studylib.net/doc/8078879/the-foot-posture-index.
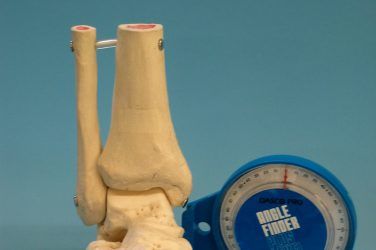
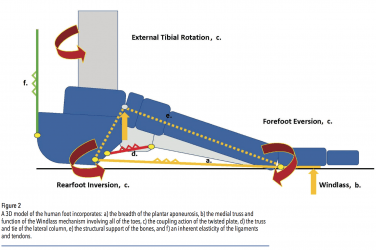
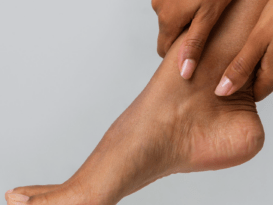
Performing the Hubscher maneuver verifies the operation of the critical Windlass mechanism and tests the functional range of motion of the first metatarsal phalangeal joint (MPJ). With the patient in RCSP, dorsiflex the hallux and note motion at the joint. Less than 12 degrees of dorsiflexion indicates a functional hallux limitus and a restriction of the Windlass mechanism. The Windlass mechanism is essential for pulling the plantar fascia taut, stabilizing the midtarsal joint during the propulsive phase of gait, and contributing to external rotation of the lower leg.
Finally, every patient should be evaluated for a leg length discrepancy (LLD). Shoulder, hip, or knee imbalance in the frontal plane or unequal wear on shoe soles are all subtle indicators that there may be an underlying structural or functional LLD. (For additional information, read “Leg-Length Discrepancies: Diagnosis and Treatment,” The O&P EDGE, September 2019.) Heel lifts, posted orthotics, or external shoe modifications can be effectively used to address any difference.
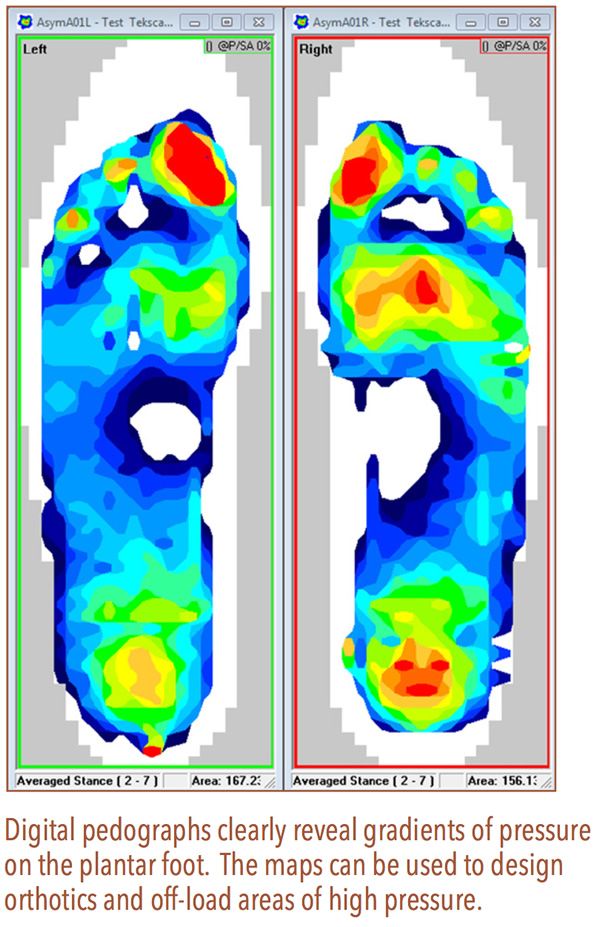
Pressure Mapping
Using pressure maps can help explain some of the findings observed during gait analysis. An ink mat pedograph is a very simple, inexpensive, and effective way to determine areas of high plantar pressure. The test can be performed with the patient standing, or it can be dynamic with the patient stepping across the mat. Recording pressure during the stance phase often indicates where orthotics may have the greatest impact.
Areas of high pressure such as at the heel, a bony prominence, or a metatarsal head will be revealed quite clearly and may explain compensations in gait. These areas can be relieved or cushioned to reduce pressure and redistribute ground reaction force. This is especially important in at-risk patient groups such as those with diabetes, Charcot arthropathy (Note that Charcot-Marie-Tooth disease is a different diagnosis), or any form of neuropathy. Providing total contact insoles, alleviating areas of high pressure, and addressing LLDs can help relieve pain that may have manifested further up the chain such as at the knees, hips, or lower back.
Dynamic Evaluation
The simplest assessment of dynamic gait is to watch the patient walk. It is well known that patients alter their gait when they know they are being observed, so one trick is to nonchalantly move the patient between exam rooms. Watch from behind as the patient walks back and forth a few times before you begin your static evaluation. Check the position and motion of the head and see that the shoulders and pelvis are level. Look for rotation in the shoulders and hips, and the swing of the arms and legs. Consider the base of gait (width of stance), the angle of gait (foot splay), and be on the lookout for obvious asymmetries such as deviations in step length or hip motion. Note if the patient walks confidently, or if he or she requires a mobility aid or shuffles. With the patient’s pant legs rolled up, observe heel and foot position in relation to the lower leg during dynamic full weight bearing gait. If the patient’s feet are not too sensitive, and he or she does not have neuropathy, you can also have him or her walk barefoot to see if there is any obvious change in gait.
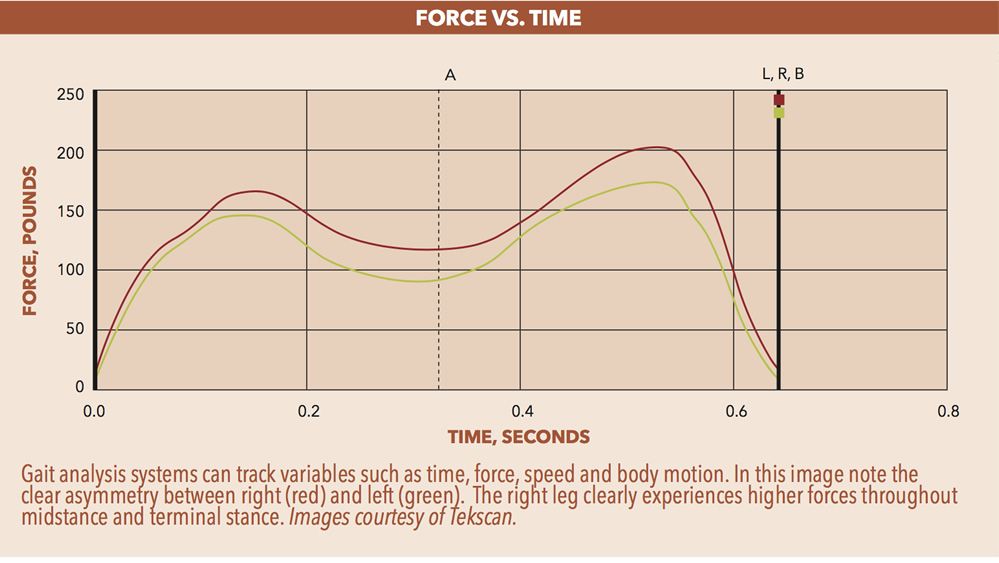
As a rule of thumb, if your eye can see a limb motion or rotation during gait then it is in the range of 5 degrees. There are many cost-effective, portable gait analysis systems that can be used in clinical settings to improve the accuracy of assessment. Pressure sensing mats that are ten feet or longer can house thousands of sensors that will reliably record timing, step length, speed, and force. Likewise, flexible in-shoe pressure sensing inlays will capture data as the patient moves freely and naturally. Asymmetry in pressure between the two feet may reveal a possible LLD. These systems deliver high resolution color analyses and even show the center of pressure travelling through the foot. There are also wireless wearable sensors that track body position in time and space. Each approach has its own advantages and they have been developed with software to help interpret the streams of data. Any of these systems can also be used to compare before-and-after scenarios, and understand the effectiveness of an orthotic, shoe modification, or assistive device.
Video Gait Analysis
It is also possible to conduct a simple video gait analysis using a treadmill and a video camera mounted on a tripod. Draw a light-colored line down the center of the treadmill’s running surface and position the camera so it can shoot video from behind and then from the side. The images can be recorded and saved on a regular laptop, replayed and watched in slow motion. Playback clearly reveals details about the extent of eversion/inversion and foot position at heel strike and toe-off. It can be very helpful in the assessment and design of orthotics and shoes. Viewing the dynamic video in a before-and-after fashion is also a valuable patient education tool. If seeing is believing, these tools help patients understand what you are attempting to do for them.
Shoe Evaluation
Pedorthists routinely refer to worn shoes as an “x-ray of gait.” You can learn a significant amount just by examining the wear patterns and condition of a patient’s current shoes.
Look at the style of shoe the patient is wearing. Is it appropriate for his or her occupation and pastimes? Patients’ shoe choices yield two valuable pieces of information: possible indications of the source of their trouble, and just how seriously they take their foot problems. If patients have ill-fitting shoes, they may be buying their footwear based on factors other than fit, such as price, fashion, availability, or an erroneous (certainty) assumption that they know their shoe size.
Even before the advent of digital pressure systems and video gait analysis, practitioners knew that the normal foot strike pattern was from the lateral heel through the midfoot and finally toe-off from the medial forefoot. This was obvious from the wear pattern visible on the sole of almost every shoe. Check each patient’s shoes to verify this. In addition, compare left and right to see if there are any differences. Overwear on a single side indicates a possible LLD, excessive unilateral motion, restriction, or some other compensation. Localized compression of the midsole material highlights where weight is loading during ambulation.
Inspection of the upper will indicate the position and motion of the foot while walking. If the upper is stretched out over the welt or midsole, the shoe could be too tight or there may be excessive pronation or supination. Forefoot deformities will often be visible on the shoe upper. For example, bunions will cause a bulge at the medial first MPJ. Pronation often breaks down the medial heel counter, while severe supination wears the lateral counter. Functional hammertoes, which are not always noted during a static analysis of the foot, sometimes leave a shiny bump on the top of the shoe.
There should be a crease across the upper of the shoe, at the ball, showing the break. If the crease is at an increased oblique angle (distal to proximal, second to fifth), this is a clue that there may be a restriction of the first MPJ—some form of hallux limitus. An improper crease position may also alert you to incorrect shoe size or poor fit.
The insole provides another wealth of data for the watchful eye. Look inside the shoe to see if the sock liner is rubbed or worn through at any point. Areas of pressure on the metatarsal heads or toes will appear as depressions or dark spots on the insole. This suggests where to place met pads and depressions when ordering custom orthotics. Put your hand inside the shoe to check the integrity of the upper lining on the roof of the toe box. A worn lining indicates hammertoes, motion while walking, or perhaps poorly cut toenails.
Conclusion
Although there are protocols for orthotic treatment based on standard diagnoses, every patient presents with a unique set of circumstances that ensures no two cases are the same. Slight differences in physiology, patient history, and lifestyle can make a difference in the effectiveness of the device that you fabricate and dispense. Our goal is to help patients regain as much function and quality of life as possible, and as such, a clear and precise examination is essential to understanding the root causes of their condition.
Séamus Kennedy, BEng (Mech), CPed, is president and co-owner of Hersco Ortho Labs, New York. He can be contacted at seamus@hersco.com or by visiting www.hersco.com.