


“You know my methods, Watson. There was not one of them which I did not apply to the inquiry. And it ended by my discovering traces, but very different ones from those which I had expected.”
—The Memoirs of Sherlock Holmes, Arthur Conan Doyle
One of the great skills in life is the ability to hold judgement until all the appropriate evidence has been presented and properly considered. While this is true in law and politics where one hopes to make accurate assessments, we also need to check our tendency to reach quick conclusions when we meet a patient for the first time. Preconceived notions about possible causes and potential cures for patients’ complaints may obscure the full picture. One way to ensure an open mind is to conduct a standard biomechanical evaluation every time.
By following a systematic approach, you will develop invaluable experience identifying normal and abnormal anatomy, joint position, range of motion (ROM), and muscle strength, and reduce the tendency to overlook subtler signs that may be present. I advocate following the same form and procedure for each patient, using a document you design yourself that can be enhanced over the course of your career (Figure 1, at the end of the article). Ideally, the patient will be wearing shorts and a T-shirt, and you will have a goniometer and cloth measuring tape. There should be sufficient space available to examine the patient sitting, standing, and walking. Many textbooks clearly describe the techniques to take standard measurements. Practice consistent methods to record data so you can make accurate comparisons across patients.
Before you begin your examination, record key patient profile data. This step provides vital information for lab technicians. Patient weight, height, and age are important considerations in the material selection and prescription of an orthotic or AFO. In addition to the diagnosis, record the chief complaint—the factor that motivated the patient to seek care—as this needs to be addressed directly. Other information such as activity level, lifestyle, and shoe style also play a significant role in the final design.

Biomechanical Evaluation with Patient Seated
1. Subtalar Joint (STJ)
Begin by checking the STJ motion. With the patient seated and the leg extended, dorsiflex the foot to 90 degrees, hold the calcaneus in one hand, and rotate the rearfoot around the STJ axis. Although it can be difficult to determine the motion of the calcaneus relative to the talus, there should be a ratio of inversion to eversion around the neutral calcaneal position of approximately 2:1. During normal ambulation, the foot should move easily from supination to pronation and back as it absorbs impact, provides stability, and finally acts as a rigid lever. The STJ also transfers motion between the rotating tibia and the weight bearing foot. Limited ROM of the STJ disrupts this natural coupling and results in compensations at other joints.
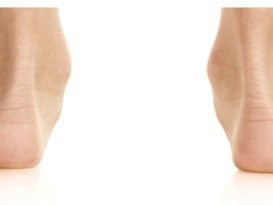
2. Forefoot Frontal Plane
Holding the rearfoot with the STJ in a neutral position, dorsiflex the plantar foot 90 degrees to the lower leg. With the opposite hand, load the fourth and fifth metatarsal heads with your thumb to replicate foot position at mid-stance. Look along the plantar foot and note the angle of the plane of the metatarsal heads in relation to the neutral rearfoot. If the medial forefoot is angled higher than the plane of the foot, this is called forefoot varus (Figure 2). This typically means the patient pronates, as the force of gravity will bring the forefoot down to the ground later in mid-stance. Conversely, forefoot valgus is noted when the lateral forefoot is angled higher than the plane of the foot, and this usually results in supination.
3. First Ray Mobility
Test the first ray range of motion in the sagittal plane by holding the second to fifth metatarsals in one hand and translating the first metatarsal up and down with the other hand. There should be equal motion in dorsiflexion and plantarflexion, approximately 5mm in each direction. Excessive motion in dorsiflexion, traditionally referred to as a hypermobility, is now classified as reduced first ray dorsiflexion stiffness. This new descriptor indicates the first ray may not be supporting the foot sufficiently later in the gait cycle. Full-width foot orthotics made from a cast with the first ray plantarflexed and with a good medial longitudinal arch can help address this by supporting the unstable medial column.
4. First Ray Neutral Position
With the rearfoot in the same neutral position, note the position of the first metatarsal head in relation to the lesser metatarsals. If the head of the first metatarsal sits below the plane of the others, or if there is greater motion plantarly, it is referred to as a plantarflexed first metatarsal (Figure 3). This may result in a combination of any of the following: the appearance of an enlargement or bony extosis at the first metatarsal phalangeal joint (MPJ), a functional hallux limitus, hallux valgus, heel pain, or a high-arched foot. Sometimes a functional orthotic with a reversed Morton’s extension, a kinetic wedge, or a first ray cut-out can help alleviate some of the symptoms.
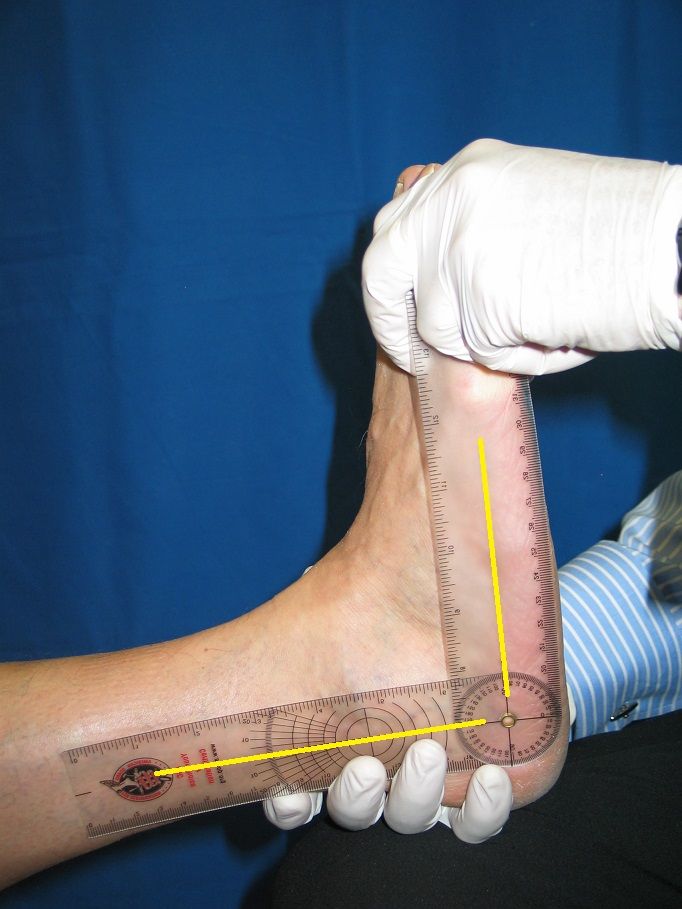
5. Equinus
Equinus is commonly defined as any restriction in ankle joint motion that does not allow for 10 degrees of dorsiflexion of the foot on the lower leg while walking. It is considered one of the greatest contributors to foot pathology. (For a more detailed discussion, refer to “Equinus,” The O&P EDGE, April 2013.) To test motion at the ankle joint, extend the knee, hold the rearfoot in the neutral position and dorsiflex the foot by gently pushing against the metatarsal heads (Figure 4). Take a goniometer and record the angle of the foot to the leg in the sagittal plane. If the foot cannot get past 90 degrees, there is either a tight triceps surae or a bony block. Then instruct the patient to flex his or her knee. If further dorsiflexion becomes available, the restriction is likely due to a tight gastrocnemius. Stretching should be recommended in such cases, and short-term use of heel lifts will decrease the demands for compensations.
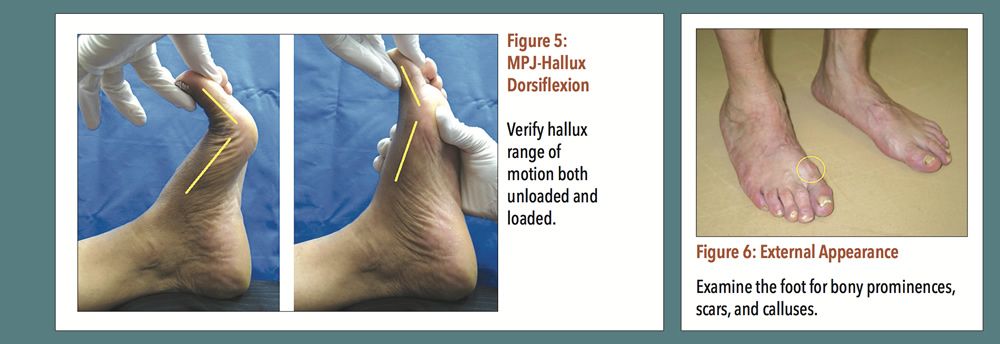
Continuing to focus on the first MPJ, check the ROM in the sagittal plane by flexing and extending the hallux (Figure 5). There should easily be 65 degrees of dorsiflexion available when it is unloaded. Then load the first metatarsal head with your thumb and note any restriction; it is not unusual to see a significant decrease in dorsiflexion. This gently simulates ground reaction force acting on the medial foot during mid-stance and terminal stance. A reduction in motion indicates a locking of the first MPJ at a critical moment and some level of functional hallux limitus. This could obstruct the Windlass mechanism, or lead to an impeded gait and perhaps eventually arthritis of the joint. (For a more detailed discussion, refer to “Hallux Limitus and the Vital Operation of the First MPJ,” The O&P EDGE, May 2014.)
7. Midtarsal Joint
Check the motion of the midtarsal joint by holding the rearfoot in neutral, grasping the foot just distal to the joint, and twisting in the frontal plane. Note the amount of supination and pronation in the forefoot. Available motion here is often a site of compensation for restrictions or abnormalities either in the ankle joint, STJ, or first MPJ.
8. Exterior Surface
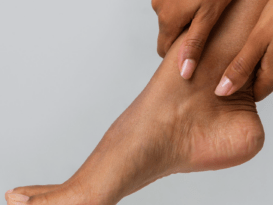
In the overall examination of the foot, note any bony prominences, scars, or calluses (Figure 6). This is especially important if the patient has any form of neuropathy. Sometimes a protrusion, such as at the base of the fifth metatarsal, can be accommodated within an orthotic. Skin calluses indicate areas of rubbing or shear. While they often occur due to ill-fitting footwear, they can also highlight biomechanical abnormalities. Limited joint ROM, or conversely excessive motion, can both contribute to callus formation. For example, a pinch callus on the medial hallux may be due a functional hallux limitus.
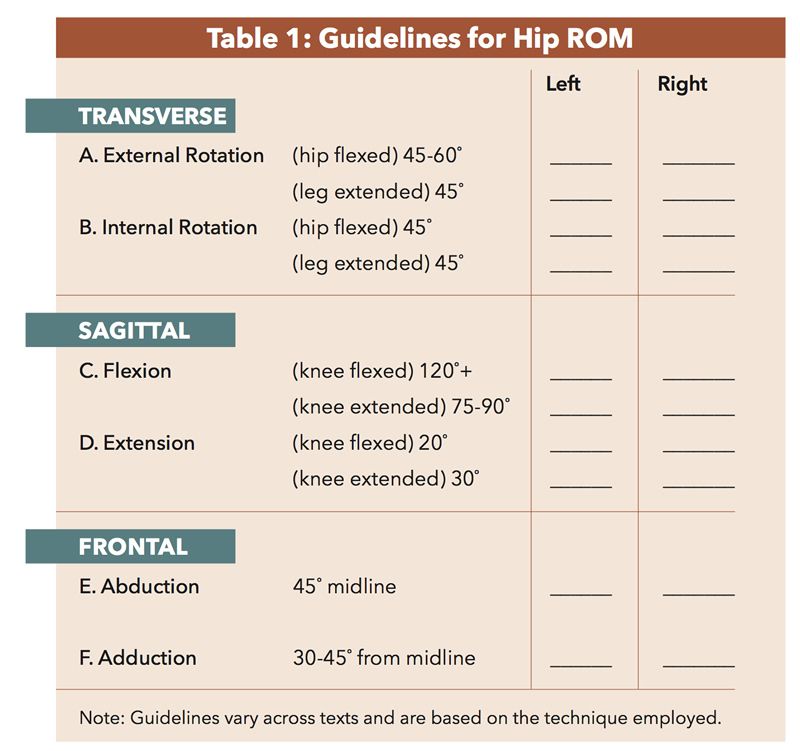
9. Hip and Knee ROM
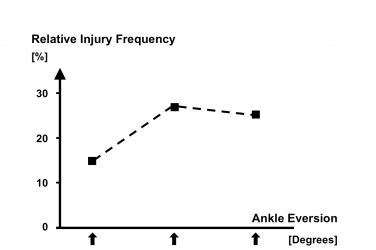
Hip and knee ROM should also be tested. It is important not to overlook any part of the biomechanical chain because a limitation in one location can affect function at another. For example, internal and external leg rotation in the transverse plane directly relate to foot eversion and inversion in the frontal plane. Some tests and ranges for normal hip ROM are given in Table 1.
10. Muscle Strength
In addition to ROM, check for muscle strength and joint quality of motion. Note any pain, crepitus, and resistance. Simultaneous pair testing will allow you to spot differences between sides.
This is by no means an exhaustive list of tests, but it is a starting point for assembling clues and isolating biomechanical limitations that may be contributing to problems. As you conduct your exam, remain vigilant for abnormalities and asymmetries. Your best tools are your eyes, for observation, plus a keen curiosity, which will ensure you keep an open mind. Part II of this article will describe how to evaluate the patient while he or she is standing and walking.
Séamus Kennedy, BEng (Mech), CPed, is president and co-owner of Hersco Ortho Labs, New York. He can be contacted at seamus@hersco.com or by visiting www.hersco.com.